Made to order in the USA. Ships in 5-7 business days.
Questions? Email sales@meshes3d.com or call 984-355-0836


8 simple steps • Everything you need is in the box
Plus your printed parts
| Step | What you're doing | Screws used |
|---|---|---|
| 1 | Side plates to bottom plate | 6 × M3×8mm |
| 2 | Back plate | 6 × M3×8mm |
| 3 | Back plate to bottom plate | 3 × M3×8mm |
| 4 | Latches (B) to top plate | 4 × M3×8mm |
| 5 | Top plate | 9 × M3×8mm |
| 6 | Latches (A) to door | 4 × M3×8mm |
| 7 | Handles | 4 × M3×8mm |
| 8 | Door to side plates | 2 × M3×25mm |
| Total | 36 × M3×8mm + 2 × M3×25mm | |
Join the two side plates and the bottom plate with the screws shown. Check the orientation before tightening: the chamfer on the bottom plate must line up with the door mounting holes (circled in blue).
6 × M3×8mmcountersunk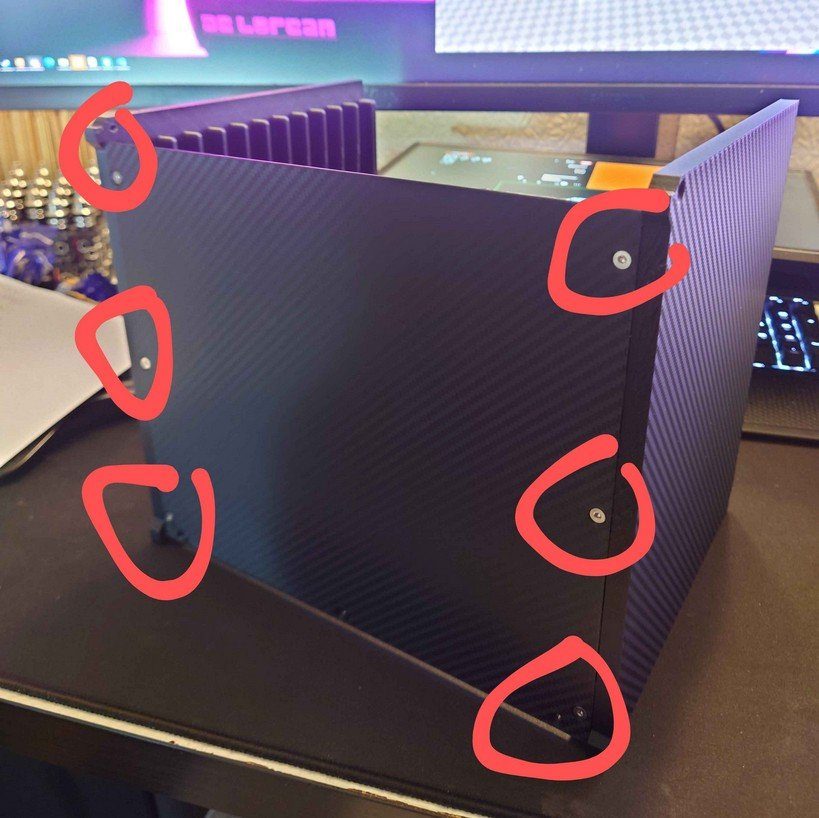
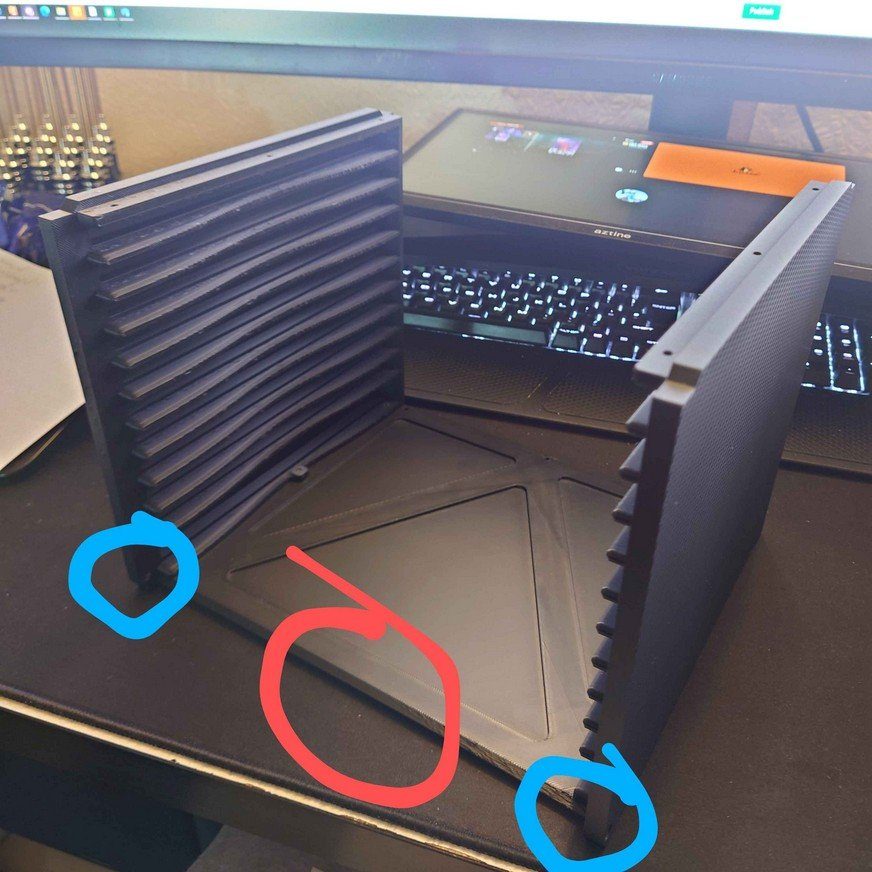
Red circles = screw holes. Blue circles = door mounting holes.
Fasten the back plate to both side plates.
6 × M3×8mmcountersunk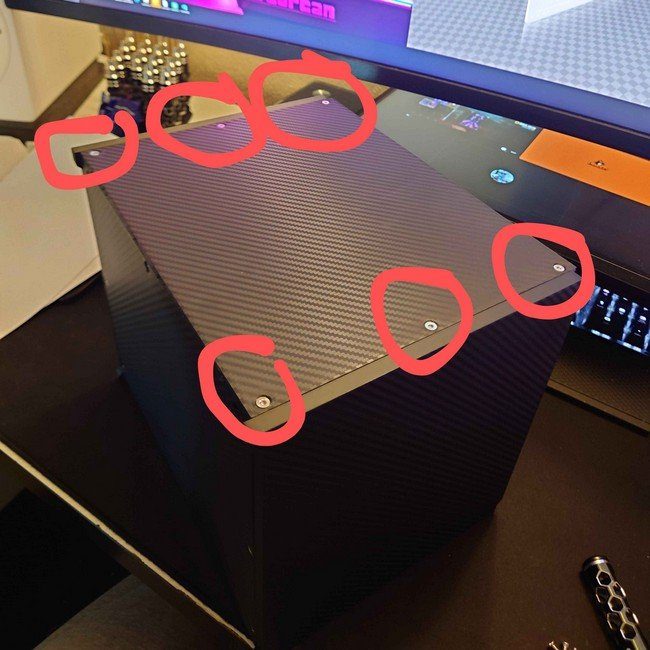
Red circles = screw holes.
Turn the chest over so the bottom plate faces up. Fasten the back plate to the bottom plate.
3 × M3×8mmcountersunk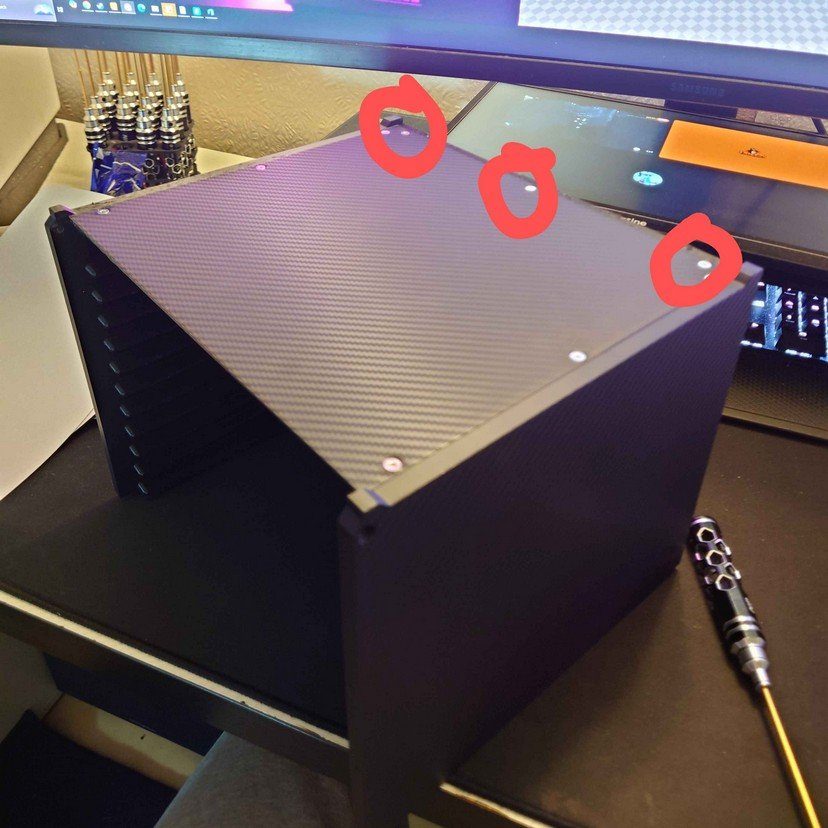
Red circles = screw holes.
Attach the two type B latch parts to the top plate.
4 × M3×8mmcountersunk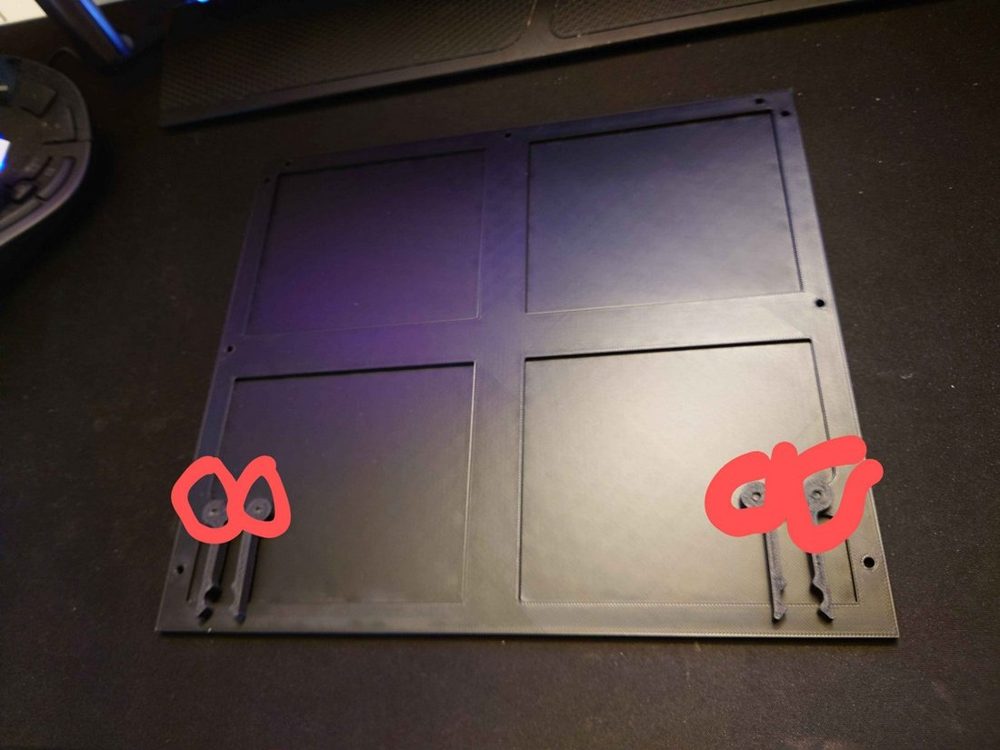
Red circles = screw holes.
Fasten the top plate to both the side plates and the back plate.
9 × M3×8mmcountersunk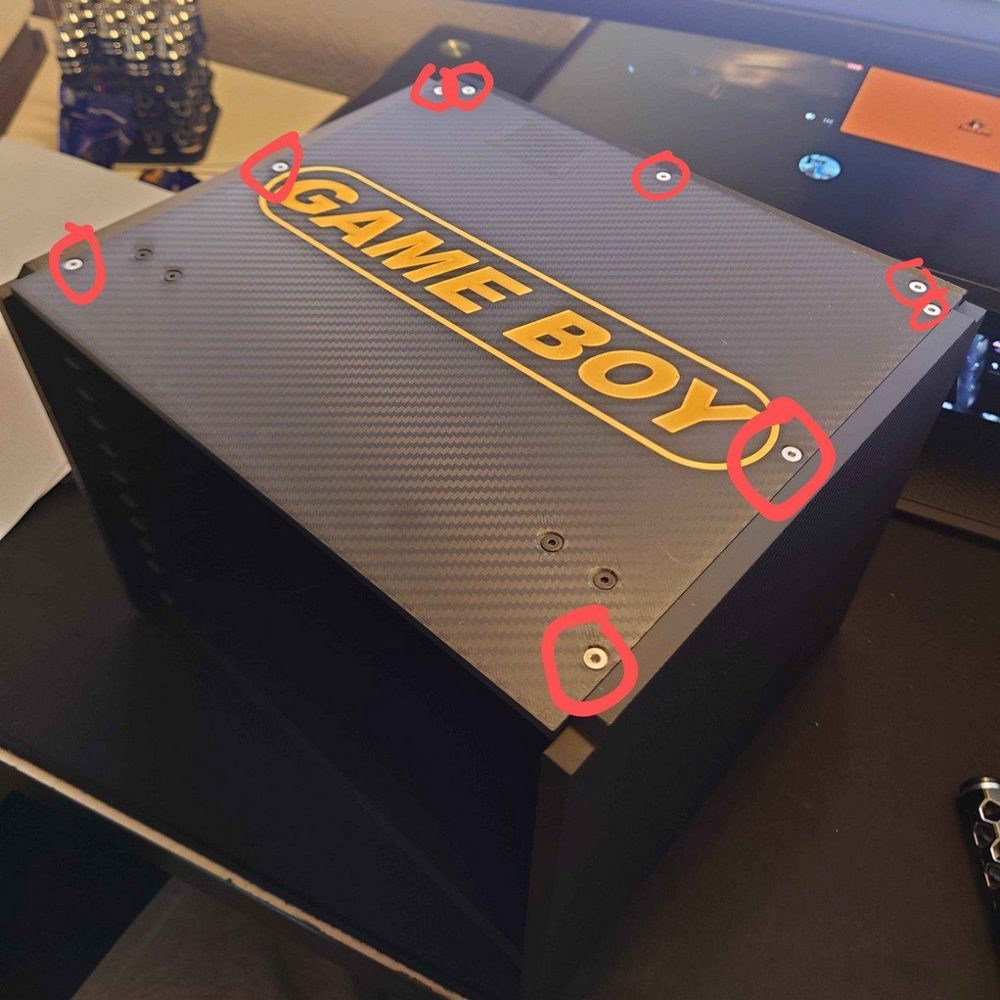
Red circles = screw holes.
Attach the two type A latch parts to the door. Note the orientation: the flush side of the latch faces the top of the door.
4 × M3×8mmcountersunk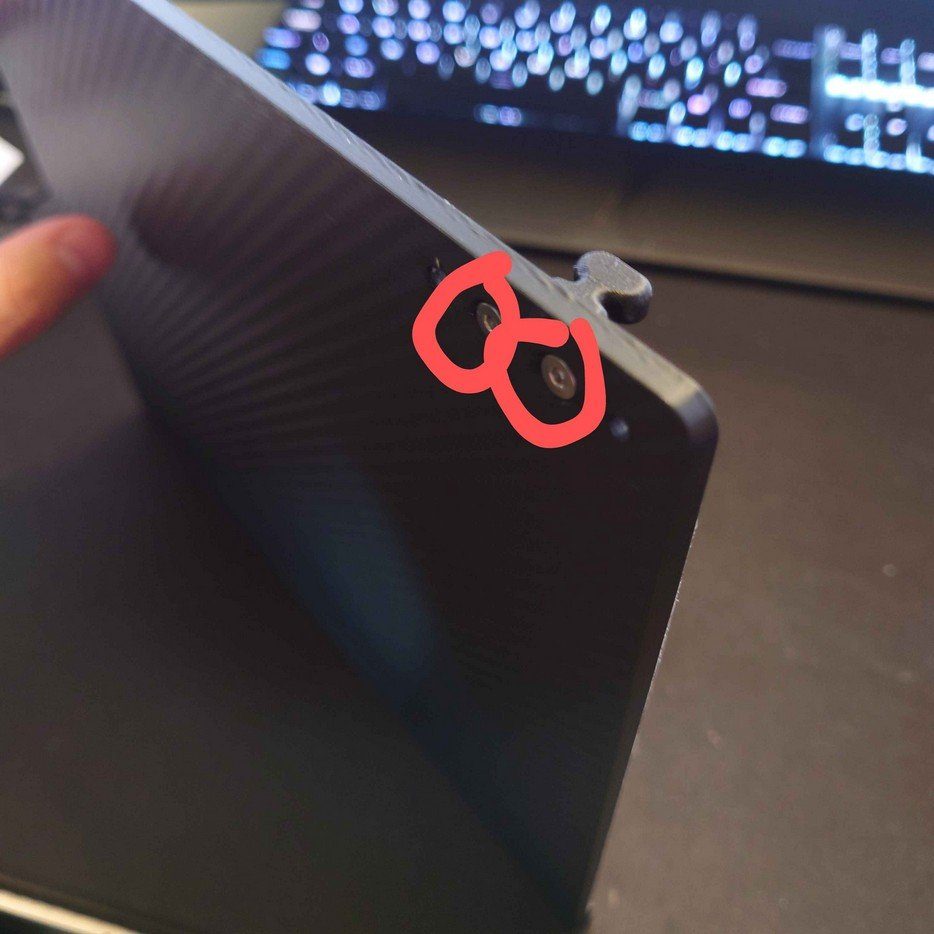
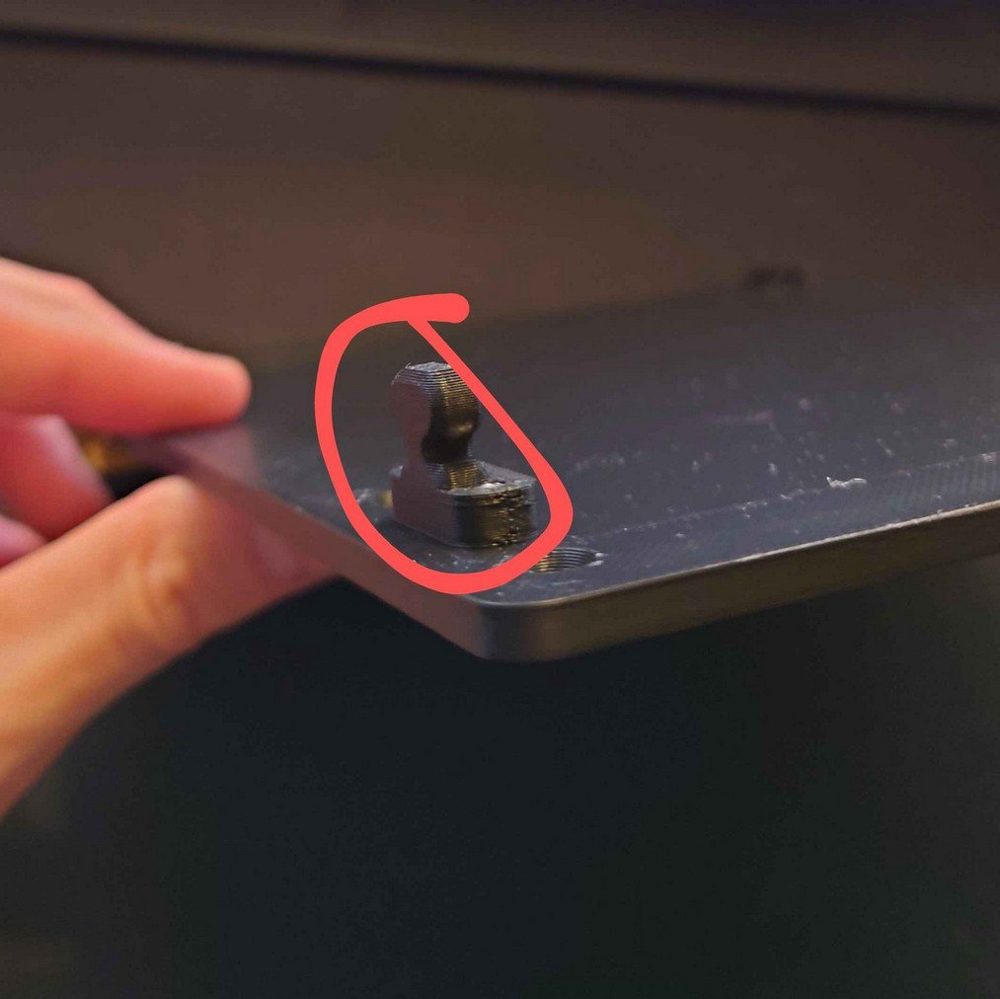
Red circles = latch and screw positions.
Attach the handles to either side of the door.
4 × M3×8mmcountersunk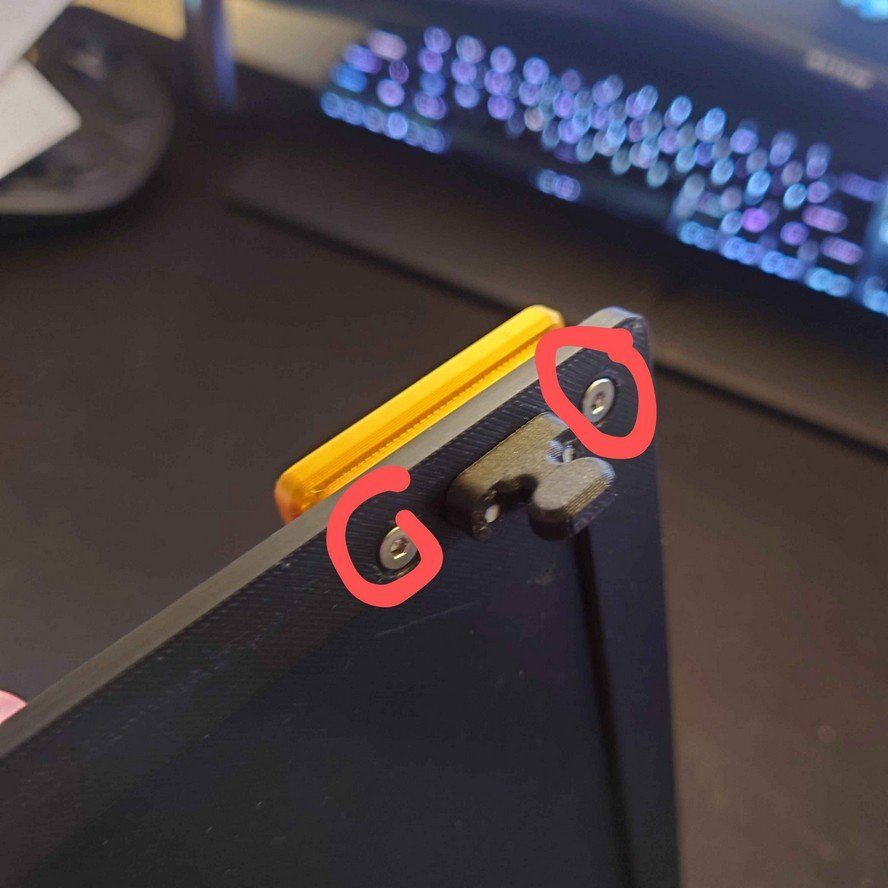
Red circles = screw holes.
Finally, attach the door to the side plates with the two long screws.
2 × M3×25mmcountersunk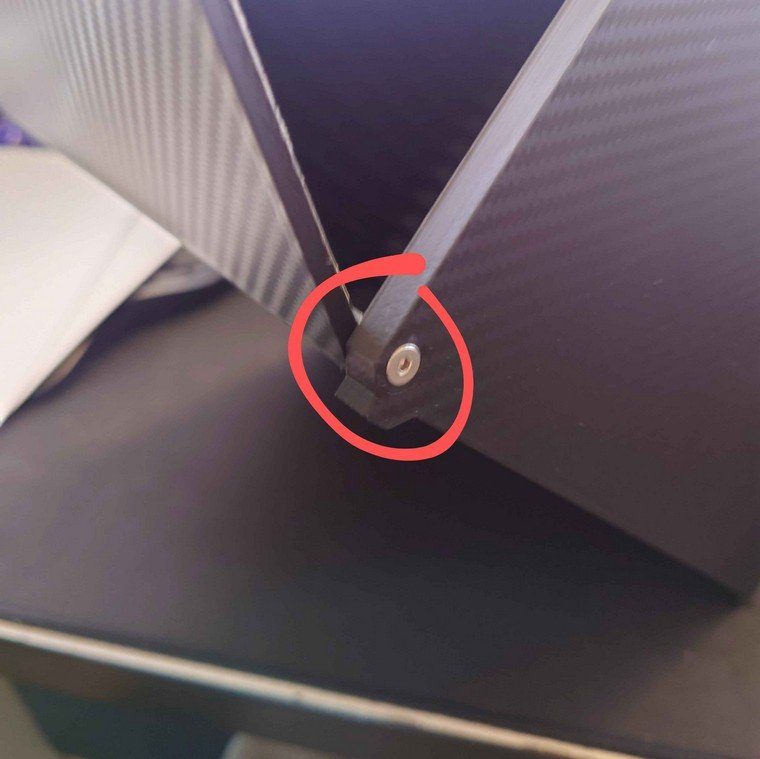
Red circle = screw hole.
Your cartridge chest is assembled. Enjoy your game collection!